Monday, October 27, 2008

Finished planting my garlic!

So I got it all done. A bit late in the season perhaps, but at least it's planted. I bought a half pound each of Music Pink and Inchelium Red.

My dilemma was that my beds are not filled yet, I plan on filling them sheet-compost-style over the fall and winter but my garlic needed to go in immediately. So... in a divine inspiration (thanks to the people at GardenWeb who got my wheels turning) I decided what to do.

I took cardboard boxes and arranged them on the east end of the garden bed.

I put a shovelful of aged horse manure with sawdust in the bottom of each box.

Then we filled them all with bagged garden soil. Eleora is SUCH a good helper :)

Then I arranged each box with the garlic on top, approximately 4 inches apart

Dug in the garlic and covered them up

Topped with a thiiiick blanket of shredded leaves

And voila! Garlic beds. Since it's so late in the season and the garden beds are, of course, raised, I thought it might be a good idea to put the manure on the bottom. My hope is that while it decomposes (since it is now moist) it will generate enough heat to keep the garlic from getting too cold until it's established. I didn't put very much in each box since I was worried about it burning the garlic. Since the potting soil was probably close to 10 inches deep I'm sure the garlic won't get burned... so we'll see how that experiment goes.

The other experiment was planting in the cardboard boxes themselves. I figure, the sides will keep the soil walled in for now until I'm able to fill the rest of the bed and then they will decompose over time once surrounded by the soil on all sides. I tried to put leaves stuffed in the sides to insulate a bit more but also to hasten decomposition by providing organic material on the other side of the cardboard. I'm also going to pile up more leaves on the west side inside the bed to provide more insulation until I can get the bed filled.

Time will tell :)

Sunday, October 26, 2008

Adventures in Sourdoughland

So, this weekend I made my sourdough bread. Bear with me, it had been a while... the old apartment I lived in killed everything. I couldn't keep a starter there, and even my plants died within weeks of moving there. This is the first time I've made bread since we moved to this house.

Look, the sponge is nice and bubbly. Very active and ready to go. What I'm going to make today is an eyeball half-sorta version of the no-knead bread method. I'm just going to eyeball the amounts and I'll bake it in the style of the no-knead recipe in my homemade La Cloche styler bread baker.

Friday night I started the bread. I put a cup of whole rye flour into the bowl.

I added a cup of water to the sponge and stirred it in until it was thoroughly mixed.


I poured in the liquidy sponge and mixed it all well with a rubber spatula.
Then I added a cup of white bread flour and a cup of whole wheat flour.

You can see it's a pretty wet sticky dough. Not one you could knead with your hands! I left the dough as is and stuck it into the fridge overnight. In the morning, I took it out about 10am and let it sit to get to room temperature and watched it until it was risen to double.

Then, I turned it out on a WELL floured board. With WELL floured hands, I patted it out into a flat semi-rectangle. With the help of my spatula, I folded the dough over onto itself a couple times, flouring well as I went along.

Here you can see my rising "basket" which is actually just an old clean birdseye diaper on top of a small stockpot. I don't use flour on the diaper, but actually I use wheat bran. If you use flour, the extreme hydration in the dough soaks through it in no time and sticks to the cloth. You want it to not stick... wheat bran is ideal for this. Rice flour also works well.


I plopped the dough in, folded side down (smooth side up). I also sprinkled more wheat bran around the edges since as the dough rises, it will stick to the cloth unless you have something there to prevent it.
So then I realized that I hadn't added SALT. Bread is pretty tasteless without salt, even tasty flavorful sourdough rye! So I plopped it back out onto the board and tried to get as much of the wheat bran as I could off.

I patted it out, and threw on about a teaspoon of salt. Now comes the fun part - kneading it in! lol....


With lots of flour and frustration I managed to knead the bread, or rather, fold it in passably.

This way I could at least take pictures of the folding process, which I forgot to do before. First, you flatten out the dough and fold over the top third into the middle.

Then, you fold the bottom third into the middle also.

Then, you fold over one side onto the other...

And voila! Folded dough.


So I put it back into my proofing "basket" and covered it with a plastic bag to keep in the moisture while it rises.

After it had finished rising I promptly realized that I forgot to keep part of the culture out for continuing my starter! So I oh-so-carefully grabbed some from the top, trying to not deflate it. You can see how well it had risen.


I mixed it with some more flour and water in a pint canning jar. Here you can see my cool top - a coffee filter lets out the carbon dioxide that the bacteria emit so the jar doesn't explode.
So then I took the top off my bread baker and tried to oh-so-gently tilt the dough onto the bottom. It didn't work very well, I made TOO much dough for the size baker I made, and so half of it hung over. When it did that, I couldn't put the top back on so I baked it like that. 450 degrees and I didn't time it... sorry! :)


Here it is, out of the oven!

And cut. It's got a nice dense and somewhat sticky crumb like the rye I love. Flavor is great, though I shoulda put in more salt. Didn't rise much, but that could have been due to the overhandling of it and also the fact that such a high percentage of it is rye. Rye flour on it's own doesn't rise well, so you always want to add wheat flour and if you have it, vital wheat gluten, to help it rise better.

But it was sure tasty! :)

Friday, October 24, 2008

Cheese update!

Alrighty... so many of you remember I made my first hard cheese about 3 weeks ago. It was supposed to be a provolone, though I couldn't get it to stretch and finally gave up on that part. You can see the original post on when I made it here.

We decided to cut into it yesterday. Wowee! That was a tangy sharp cheese! Tommy was absolutely in heaven. He loved it, and wants me to make more - he said it tasted like the goatcheese his grandmother used to feed him when he was a kid. That's actually a pretty good compliment because he has said many times he wished he could have that cheese again and never had one that was like it. It was a bit too stout for me, and I think it was so stout because of the type of lipase enzymes I used (KA). Tommy just really loves strong flavored food. I bet he'd love it if I put garlic in it next time

The flavor was really good, it was a very dry and hard texture. I think I lost a lot of butterfat in the whey because I remember it was pretty milky, and the cheese didn't taste like it had as much fat in it as I'd expect for being made from whole milk. The flavor itself was cool because you took a bite and it tasted pretty good and then exploded in your mouth with flavor! I know that sounds cheesy (ooo, pun not intended lol) but it really was how it felt to me. I liked it, though it was too strong for me to eat but Tommy gobbled it up. I now have a pot that will accomondate 2 gallons of milk and I have a cheese press so I think I'll try the same cheese pressed next time. It looked like if I aged it a bit more it could be a passable sub for parmesan, though with WAY more flavor. We'll see!

I think my next one will be a farmhouse cheddar, though. Tommy now wants me to let him know next time I make cheese so he can watch the process. Who knows, this might be something we could both get in to :) But I'll do my best to keep him in this cheese, I hope it turns out as good next time I try to make it. So, without further ado, more pictures :)


The unveiling of the cheese :) This wasn't pressed, all I did was hang it. It ended up a pretty weird texture on the outside, very "brainy" looking. I think I'll press the next one just lightly to see how that goes.


The final product. You can kinda see just how dry it is - and it was only aged for 3 weeks. I think it was because of the lack of humidity in my basement - though it turned out pretty darn good!


Happy cheese-loving husband :)

Making Sourdough starter, step by step

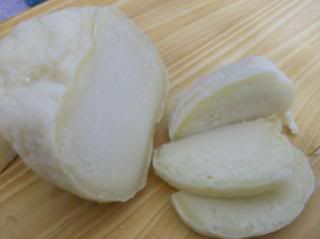
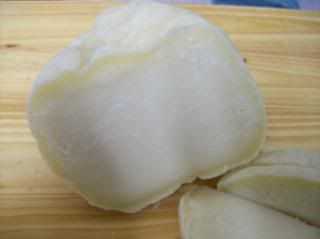
Sourdough is a wonderful thing. I think sourdough bread is one of the best things in life. Especially a good hearty sourdough rye, toasted with butter... yum.

Making starter is interesting because depending on what flour you use to make it, you will get different "yeasts." Some of the most flavorful starters are made with rye flour because of the microorganisms that life on rye, versus wheat. Many bakers who keep their own starters started all of them with rye, and then turned them into a whole wheat or white wheat starter by feeding it with the chosen flour.

So naturally, I begin my starter with rye, as close to the berry as possible. I got some pumpernickel rye flour from Barry Farm, and that's what I'm using. Many people make a starter more fluid, I prefer to use a 1-1 by volume ratio. It isn't exact, and if you are going to REALLY get into it and measure hydration and whatnot, you will want to use weight, not volume, since volume can really vary. I really only go by volume because I don't have a good scale, I'm lazy, and I've gotten to the point where I bake my bread by "feel" and not so much by measurements.

Day 1
So to begin, I've got a glass bail jar with a rubber seal. You want to be able to release the pressure at some point, since a buildup of the carbon dioxide gases can cause a sealed container to shatter. You can use pretty much anything for this, though I wouldn't advise a metal container. Even a gladware container would be fine. I used to use just a regular quart-size canning jar, but you can use anything.


I start with a tablespoon of flour and a tablespoon of water.


It's important to use purified water when making your starter. Chlorine in tapwater can quite easily kill the microorganisms that we're trying to feed here.


So I mix them together with a plastic spoon, and I've set it into a warm spot for the day. Easy peasy!


Day 2
I'm feeding the starter with another tablespoon each of purified water and flour. The flour I'm using is a certified organic pumpernickel rye. I'm not usually big on "certified organic" but in this case I choose organic to increase my chances of getting a successful starter, since they use less chemicals in organic (and yes, the FDA does allow some chemicals in certified organic). Slightly off the subject, but I'd take Certified Naturally Grown over Certified Organic any day. Once we let the beaurocrats and their sticky fingers get involved in things, they tend to get a bit messy. But anyway...

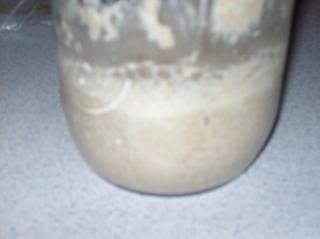
I pulled the jar out and I was amazed to see microbial activity already! That's pretty unusual, generally it takes a couple days to start really seeing stuff happen. I bet it's because of the flour I used. I tried to get a good picture but I'm not sure how well it comes through (though you can click on the picture to the left for a larger picture and I bet you can see what I mean). When I mixed it yesterday I pushed all the starter to one side with my spoon so that if the "action" showed up, it would be easier for me to see. It shows up as tiny bubbles against the glass - that's carbon dioxide that has been emitted by the bacteria that we are trying to grow.

As the starter becomes more and more concentrated and powerful, those bubbles will grow bigger and also will have more of them. Basically, what we're seeing here is the beginnings of leavening action - the bacteria, or yeasts, feeding off the flour to produce the carbon dioxide.

This is looking very promising! So anyway I added my other tablespoon of water and flour and put it back into its warm little hidey-hole. It has about the same consistency as oatmeal (though I know oatmeal varies, too...). One more observation - when I pulled the starter out today, it had a bit of condensation on the top of the jar. That means that it was warmer than average room temperature.

Considering that I had so much culture growth, I think the spot I chose is a perfect one. It's on a small table right above a heating duct... I don't keep my house super warm and so it's probably in one of the few "good" spots. Other good spots are usually on top of refrigerators, in a sunny window, or any other place that keeps a nice warm temperature somewhat regularly. They will grow in less then optimum temperatures, but obviously much more slowly and I tend to avoid this when I'm beginning a new starter, because I don't want to give OTHER bacteria a chance to set in (or mold... yuck!)

Day 3
Fed the starter with 2 tablespoons each of water and flour. Generally, the rule is that you double the amount of starter each time. Obviously it would get to be a lot, so tomorrow I'll measure out 1/4 cup of the starter and double that. Not much activity today - no pictures, since none came out. I seem to remember something about sourdough starters that started off strong and then petered out and came back after a while. I think it has something to do with the type of bacteria that are growing - the initial activity is from one sort, but then they create an inhospitable environment for themselves by the alcohol (or something) that is a byproduct of their fermentation. I think, though, that it creates a more hospitable environment for the GOOD bacteria that we're trying to grow. But, I don't really even know... I can't seem to find the right keywords to google it. Also, though, it's been pretty cold and we weren't home all day yesterday so it didn't have much heat to grow with, either.

Day 4
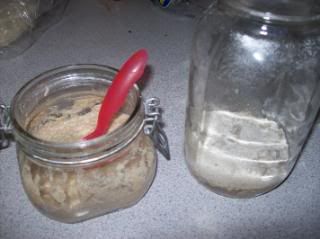
Measured out 1/4 cup each of flour, water, and starter into a new quart canning jar. I'll rotate jars, it's easier to measure that way. It's smelling good, a bit sour, but still not much activity. I'm pretty sure at this point that it's the bacteria thing I was talking about before. I didn't take any pictures again since there's not much to report.

Day 5
OK, activity has resumed. No picture because my camera was out of batteries this morning and I was in too much of a hurry to find the other set. But it looks quite a bit like day 2's photo, except more in volume. When I stirred it, the volume decreased so there was quite a bit of bubble "action" going on there (to quote Rachael Ray). So I added 1/2 cup each of flour and purified water and left for work. I bet I'll be baking bread in the next couple days :)


Day 6
This morning the starter has risen quite a bit and is foamy on top. I tried to get a picture but couldn't get a good one, so here's what you got! I measured 1/2 cup of starter into a clean jar and added 1/2 cup more flour and water. I think I'll be baking bread this weekend.

Day 7

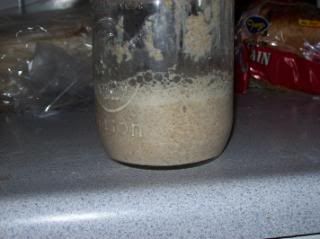
This morning looks the same as yesterday except way bigger. The bubbles that I can see look more like the bubbles inside a loaf of baked bread. I bet I could probably use it as is but I'll keep feeding it and then probably start the bread tomorrow evening. It's a good idea to proof bread a long time at colder temps, especially sourdough, to really develop the flavor. Some people don't like sourdough too "sour" but we love it like that. There's also a layer of foam on top like yesterday, which is weird, I don't remember seeing that ever before. Fed it again with 1/2 cup flour & water to 1/2 cup starter.

The temps in our house have been pretty cold this week since we are now gone all day and the heater is off when we aren't home and at night... so really, the heater is only on for about an hour in the morning and then from 5-10-ish at night. I'm sure this would have developed quicker if we'd had a warmer house... it's generally a good idea to begin your starter in the summertime when the heat can help the bacteria grow. But oh well, right? :)

Day 8
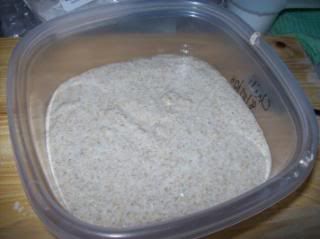
OK I'm going to bake bread tonight! This morning the starter was ready to use - the way you know this is if it rises to twice it's volume and then sinks back down, that's when you know it's strong enough.

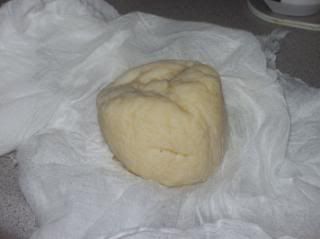
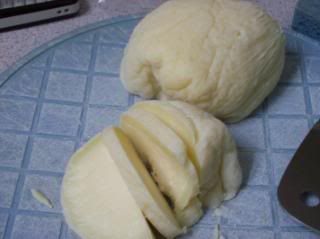
So I left the entire amount and fed it with 1 cup each of flour and water. At this point I've mostly gone through my pound of pumpernickel rye. I do have another pound and also some King Arthur rye so that's what I'll use tonight, with a little whole wheat and white bread flour. So anyway, this doubled it's volume and so I put it into a gladware container. Tommy is home today so the house will be warmer, so I bet it will rise quite a bit and the quart size jar wouldn't accomondate that much. Basically, at this point, I'm beginning the sponge. I'll let it ferment all day and then when it's time to start the dough for real, I'll separate out a half cup of starter and use that to continue the starter and the rest will be used for making my bread dough. I'll put that process in a separate post, though.

So there we have it! Sourdough starter deluxe. I will tell you, though, if I'd fed it every 12 hours it would have been done a lot quicker, probably. However, I am lazy, and so I'm OK with it taking a bit more time.

Wednesday, October 22, 2008

Wii!

So last week we bought a Wii and a Wii Fit. I'd been wanting one for a while but we didn't have the cash for it so when the IRS graciously decided to finally give us our tax refund and stimulus (don't ask... long story) we went out and got one! My sister has one and I think it's really fun, and the Fit looked cool. We've both really enjoyed it in different aspects, and one of the things I really like is starting my morning with some stuff to get my blood going just a little bit.

There's pros and cons to it. Fact is, I'm pretty overweight and while I'm motivated to lose weight, I am limited by the fact that I'm nursing Sophia. When you are nursing you don't want to go *too* gung-ho on weight loss because you could lose your milk supply, which I don't want. Before I got pregnant, I was working out on my lunch breaks and I was making good, steady progress. Of course, now I'm pretty much back to where I started from except I no longer live at the apartment complex with a workout room.

Therefore, I need something I can do at home while the kids are asleep (so even going walking or jogging would be out anyway). The Wii Fit has been great so far - I've been able to stay motivated, get up and do some yoga and step aerobics. Is it the most wonderful powerful workout ever? Of course not. Is it great for a working mom of 2 who has limited time available? Absolutely! I've been losing weight steadily since I started about a week & half ago. I've also been focusing on eating better (of course). One of the good things is that Tommy also wants to focus on his fitness - his old job was physically intense and kept him in pretty good shape but of course now he's not doing that anymore. He has a bowflex he's been using which is working well for him, but he's also seriously on board with the better food type stuff.

I cook from scratch mostly when I can. though with working and whatnot it gets complicated. In any case, I'm very happy with it. It's a nice way to start my morning, is fun enough that I haven't been unmotivated (except yesterday when I slept in because Eleora decided at 4:30 am that she was done sleeping for the night and I fought her on it until 7am). The yoga is surprisingly do-able and I like the step aerobics, though I wish I could do it at a faster pace.

What I REALLY like about it is that I can see my weight loss on a graph all done up for me and it tracks everything. Since I generally just do my weigh-ins at 7am in the morning, it's pretty consistent as far as fluctuations are concerned and so I know the results I'm getting are pretty accurate. Of course, I am keeping in mind that just nursing burns about 2-300 calories per day anyway so I'm sure that's helping, but I never had much luck with the nursing helping my weight loss by itself. I just unlocked the boxing exercise today and I'm hoping that will be something that I can do. The boxing game on the regular Wii Sports is VERY aerobic and had my arms sore for days.

So all in all, I really like it and it was a great investment. Very worthwhile. Basically, you get what you put into it. There's lots of ways to cheat and pretend you worked hard when you didn't. For me, I figure, I'm just cheating myself and so if I'm feeling lazy or tired that particular day, then I'll just do easier exercises.

Coffee grounds again!

Good news - I'll get to collect the grounds from work! I'll need to go get a container. I have a 3lb coffee can at home that's empty and I might cover it but I think I might want to get something bigger that I can put garbage liners or even paper grocery bags in. That way I don't have to rinse it out and it won't get stinky over the weekend. I am one of the last folks out of here so I don't think it'll be a problem to keep it up. This will be great for my compost pile and also the lawn! Coffee gounds can be bagged up and kept in the garage all winter and spread on the lawn in the spring, though I imagine it would be a bit stinky. I might just try to compost them all... but it depends on how much it ends up being. I'm really glad I got this all hooked up since I haven't found an actual coffeeshop that will save them for me yet.

So that's good news! Work is going well and I'm getting right back into the swing of things. The bad part is that it's being a difficult adjustment for all of us as far as the daycare thing. The girls are a little more volatile... Eleora is acting even MORE terrible 2, and Sophia yesterday spent a good 30 minutes just crying hysterically before I could get her calmed down enough to eat and go to sleep. This isn't going to be easy. I think I'll start a monthly countdown... lol. If Tommy finishes his program in May of 2010, I'd say by July or so I should be done. He does have a job waiting for him already at his old employer (they were so sad to see him go that they are going to create a drafting position for him, isn't that awesome!) so I don't have to worry about him finding a job. So, that's 21 months away.

So... 21 months and counting. :)

Tuesday, October 21, 2008

Coffee grounds

Well, my first day back at work went pretty well. OK the time at work, that is. The time dropping off the girls, not so good. But I'll survive. The photo is of my backyard... the leaves are really beginning to turn color. Not a whole lot of drop yet, though. Not enough to make it worthwhile to bring out the leaf mulcher, though I did buy an extension cord for it the other day so I'll be ready when the time comes.

The good news is that while I was gone from work, they have really begun a more concerted effort to become more green as a company. They had already begun doing that while I was there, but now even more so - they even started a company forum on how to be more "green."

What does this mean? Well, we throw out TONS of used coffee grounds every morning. There's a lot of people in my office who drink coffee. I've asked a couple times about being able to collect the grounds and take them home for my compost but I never really got a good response. I think now might be a good time to ask again.

If any of my dear readers happen to work in an office where coffee is being served I'd probably recommend seeing if you can set up a collection bin. I know my mom used to take the grounds home when she worked in an office - they are a fantastic source of a "green" for composting. I remember when we lived in Colorado, they used to say the soil was so alkaline that you couldn't put enough UCG (Used Coffee Grounds) into it. Worms love them, lawns love them, compost piles and veggie gardens love them.

I've contacted a couple espresso drive thrus around here but none of them seem very inclined to keep a separate trash can for the UCGs so they can be composted. Why? It isn't very difficult! I worked at a great espresso drive-thru in Colorado and we saved all of our grounds... and they always got taken by our customers. There's one more place I want to go to, a smaller place but the only place around here that makes a decent frozen coffee (from scratch) instead of the same-ol granita mix that everyone else uses. In my thinking, since they put more effort into the coffee and making it quality, they might be more willing to separate their grounds (if they don't already)... the other places kinda give me the "give us your money cookie cutter" vibe. Who knows. Plus the owner is a really nice eastern european lady and europeans generally know the value of compost. We'll see! Hopefully I'll get out that way this weekend.

Monday, October 20, 2008

Trip up to the property

On Saturday we went for a day trip up to the property. My parents and my sister both have trailers up there and were camping, but I didn't want to stay since it would get cold and T had a lot of homework to finish. Eleora had a blast up there! I took a bunch of pictures of the place so that you could see the future place. The parcel I chose is more wooded, and so I'll be doing a lot of clearing out, but it's absolutely perfect.

Here we are on our property! Sophia was asleep when we took the picture, so she isn't in it. Isn't it a beautiful view? I can't wait to look out my kitchen window and see that! So basically, to reiterate... my parents bought this 120 acre piece of land and each of us siblings has chosen a parcel and we will buy it from them and build on it. Most of us are planning on living there full-time at some point except the youngest, she's still not sure. It's a gorgeous spot, and the beauty is that we each liked a different piece and so there was no arguing about which spot. Each of us will have 20 acres and so plenty of space around us but we'll still be close by each other.

This all came about because when I was young, we lived out in the semi-country on a little acreage. There were several houses all grouped together, my cousins in one. I remember that time so well, and I had such a wonderful life when we lived there... catching tadpoles, eating peas from the garden, playing in the mud, swinging on the rope swing, running around with the dog, you name it. I wanted that life for my children! As we all began to discuss things we realized that all of us siblings wanted the same thing for our kids. So we decided that we would all move up there, giving each other enough space to do their own thing, but being close enough that our kids could grow up together. It's important to me that my kids grow up in the country, and I'm excited for the day that we can move up there. If we're lucky, we might be able to get up there in about 5 years or so.

The northwest view
This is a flat "bench" area that is right north of the homesite. The homesite overlooks the valley, but right below is a longish flat area that will be perfect for greenhouses or maybe an orchard someday.

This is the southwest view of the place You can see the bench down below a bit - it's the lighter, un-shaded area before the trees start.Looking back down the driveway
The southwest view
This is the campsite that will someday be the homesite.


I brought up a couple cloves of my garlic to plant. The soil up there is fantastic! We'll see what happens.

Here's me with my little helper planting the garlicShe's bringing leaves over to the garlic to mulch it. Isn't she cute?
And the mulched pile. I planted the garlic all within about a square foot (5 cloves) and then I stuck the stick up to mark the spot. With the leaf mulch it ended up looking like a shallow grave... :)

This is actually directly south of where our home will be located - at the highest point on the bluff.
Partly cleared area - this will all be a part of my growing space someday. Right by the second tree on the left is where I planted my garlic.
Our new wheels! It's a Honda CR-V, we just got it on Friday. It sure is nice to drive a vehicle that isn't all rickety and feeling like it will fall apart any minute! Thank you, Granddad!
Eleora loved the swing - the men put in a playground for the kids since we have so many young kids in our family. It's a really great thing for them when we are all camping up there!
She also had fun in the dirt

Here's Eleora planting wildflower seeds with her Grammie :) Oh, and Snick the dog...

This is actually a photo of what will be my brother's parcel, but it was a cool picture so I wanted to include it.
And here's the pasture - the closest part will be my brother's and then further along will be my parents' part - the parcels run parallel to each other.


So there you have it! It'll be nice to take pictures in the springtime - all the grass is brown and dying right now but the place is so gorgeous in the springtime - everything greens right up and there's so many flowers everywhere!