Sourdough is a wonderful thing. I think sourdough bread is one of the best things in life. Especially a good hearty sourdough rye, toasted with butter... yum.
Making starter is interesting because depending on what flour you use to make it, you will get different "yeasts." Some of the most flavorful starters are made with rye flour because of the microorganisms that life on rye, versus wheat. Many bakers who keep their own starters started all of them with rye, and then turned them into a whole wheat or white wheat starter by feeding it with the chosen flour.
So naturally, I begin my starter with rye, as close to the berry as possible. I got some pumpernickel rye flour from Barry Farm, and that's what I'm using. Many people make a starter more fluid, I prefer to use a 1-1 by volume ratio. It isn't exact, and if you are going to REALLY get into it and measure hydration and whatnot, you will want to use weight, not volume, since volume can really vary. I really only go by volume because I don't have a good scale, I'm lazy, and I've gotten to the point where I bake my bread by "feel" and not so much by measurements.
Day 1
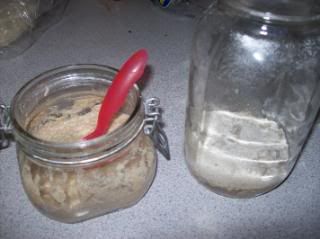
So to begin, I've got a glass bail jar with a rubber seal. You want to be able to release the pressure at some point, since a buildup of the carbon dioxide gases can cause a sealed container to shatter. You can use pretty much anything for this, though I wouldn't advise a metal container. Even a gladware container would be fine. I used to use just a regular quart-size canning jar, but you can use anything.

I start with a tablespoon of flour and a tablespoon of water.

It's important to use purified water when making your starter. Chlorine in tapwater can quite easily kill the microorganisms that we're trying to feed here.

So I mix them together with a plastic spoon, and I've set it into a warm spot for the day. Easy peasy!
Day 2
I'm feeding the starter with another tablespoon each of purified water and flour. The flour I'm using is a certified organic pumpernickel rye. I'm not usually big on "certified organic" but in this case I choose organic to increase my chances of getting a successful starter, since they use less chemicals in organic (and yes, the FDA does allow some chemicals in certified organic). Slightly off the subject, but I'd take
Certified Naturally Grown over Certified Organic any day. Once we let the beaurocrats and their sticky fingers get involved in things, they tend to get a bit messy. But anyway...

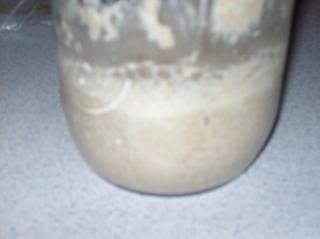
I pulled the jar out and I was amazed to see microbial activity already! That's pretty unusual, generally it takes a couple days to start really seeing stuff happen. I bet it's because of the flour I used. I tried to get a good picture but I'm not sure how well it comes through (though you can click on the picture to the left for a larger picture and I bet you can see what I mean). When I mixed it yesterday I pushed all the starter to one side with my spoon so that if the "action" showed up, it would be easier for me to see. It shows up as tiny bubbles against the glass - that's carbon dioxide that has been emitted by the bacteria that we are trying to grow.
As the starter becomes more and more concentrated and powerful, those bubbles will grow bigger and also will have more of them. Basically, what we're seeing here is the beginnings of leavening action - the bacteria, or yeasts, feeding off the flour to produce the carbon dioxide.

This is looking very promising! So anyway I added my other tablespoon of water and flour and put it back into its warm little hidey-hole. It has about the same consistency as oatmeal (though I know oatmeal varies, too...). One more observation - when I pulled the starter out today, it had a bit of condensation on the top of the jar. That means that it was warmer than average room temperature.
Considering that I had so much culture growth, I think the spot I chose is a perfect one. It's on a small table right above a heating duct... I don't keep my house super warm and so it's probably in one of the few "good" spots. Other good spots are usually on top of refrigerators, in a sunny window, or any other place that keeps a nice warm temperature somewhat regularly. They will grow in less then optimum temperatures, but obviously much more slowly and I tend to avoid this when I'm beginning a new starter, because I don't want to give OTHER bacteria a chance to set in (or mold... yuck!)
Day 3
Fed the starter with 2 tablespoons each of water and flour. Generally, the rule is that you double the amount of starter each time. Obviously it would get to be a lot, so tomorrow I'll measure out 1/4 cup of the starter and double that. Not much activity today - no pictures, since none came out. I seem to remember something about sourdough starters that started off strong and then petered out and came back after a while. I think it has something to do with the type of bacteria that are growing - the initial activity is from one sort, but then they create an inhospitable environment for themselves by the alcohol (or something) that is a byproduct of their fermentation. I think, though, that it creates a more hospitable environment for the GOOD bacteria that we're trying to grow. But, I don't really even know... I can't seem to find the right keywords to google it. Also, though, it's been pretty cold and we weren't home all day yesterday so it didn't have much heat to grow with, either.
Day 4
Measured out 1/4 cup each of flour, water, and starter into a new quart canning jar. I'll rotate jars, it's easier to measure that way. It's smelling good, a bit sour, but still not much activity. I'm pretty sure at this point that it's the bacteria thing I was talking about before. I didn't take any pictures again since there's not much to report.
Day 5
OK, activity has resumed. No picture because my camera was out of batteries this morning and I was in too much of a hurry to find the other set. But it looks quite a bit like day 2's photo, except more in volume. When I stirred it, the volume decreased so there was quite a bit of bubble "action" going on there (to quote Rachael Ray). So I added 1/2 cup each of flour and purified water and left for work. I bet I'll be baking bread in the next couple days :)
Day 6

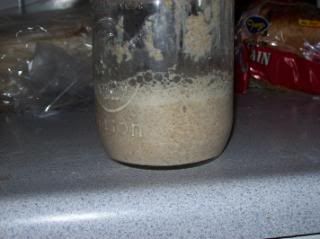
This morning the starter has risen quite a bit and is foamy on top. I tried to get a picture but couldn't get a good one, so here's what you got! I measured 1/2 cup of starter into a clean jar and added 1/2 cup more flour and water. I think I'll be baking bread this weekend.
Day 7

This morning looks the same as yesterday except way bigger. The bubbles that I can see look more like the bubbles inside a loaf of baked bread. I bet I could probably use it as is but I'll keep feeding it and then probably start the bread tomorrow evening. It's a good idea to proof bread a long time at colder temps, especially sourdough, to really develop the flavor. Some people don't like sourdough too "sour" but we love it like that. There's also a layer of foam on top like yesterday, which is weird, I don't remember seeing that ever before. Fed it again with 1/2 cup flour & water to 1/2 cup starter.
The temps in our house have been pretty cold this week since we are now gone all day and the heater is off when we aren't home and at night... so really, the heater is only on for about an hour in the morning and then from 5-10-ish at night. I'm sure this would have developed quicker if we'd had a warmer house... it's generally a good idea to begin your starter in the summertime when the heat can help the bacteria grow. But oh well, right? :)
Day 8

OK I'm going to bake bread tonight! This morning the starter was ready to use - the way you know this is if it rises to twice it's volume and then sinks back down, that's when you know it's strong enough.
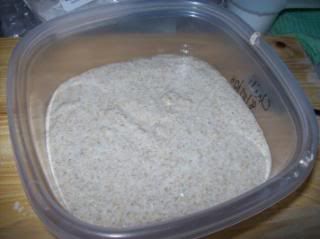
So I left the entire amount and fed it with 1 cup each of flour and water. At this point I've mostly gone through my pound of pumpernickel rye. I do have another pound and also some King Arthur rye so that's what I'll use tonight, with a little whole wheat and white bread flour. So anyway, this doubled it's volume and so I put it into a gladware container. Tommy is home today so the house will be warmer, so I bet it will rise quite a bit and the quart size jar wouldn't accomondate that much. Basically, at this point, I'm beginning the sponge. I'll let it ferment all day and then when it's time to start the dough for real, I'll separate out a half cup of starter and use that to continue the starter and the rest will be used for making my bread dough. I'll put that process in a separate post, though.
So there we have it! Sourdough starter deluxe. I will tell you, though, if I'd fed it every 12 hours it would have been done a lot quicker, probably. However, I am lazy, and so I'm OK with it taking a bit more time.

 So, this weekend I made my sourdough bread. Bear with me, it had been a while... the old apartment I lived in killed everything. I couldn't keep a starter there, and even my plants died within weeks of moving there. This is the first time I've made bread since we moved to this house.
 I added a cup of water to the sponge and stirred it in until it was thoroughly mixed.


 So then I realized that I hadn't added SALT. Bread is pretty tasteless without salt, even tasty flavorful sourdough rye! So I plopped it back out onto the board and tried to get as much of the wheat bran as I could off.